mknals programming (under construction) |
 |
mknals programming (under construction) |
|
This page shows how to create a simple ftp server on IBM Cloud with a firewall. We will use minimal requirements, but enough to run a functional test or basic setup.
You will need an IBM Cloud account. Usually, new accounts provide some credit in case you want to try it. The server we will create has a published price of less than 30 euro/month.
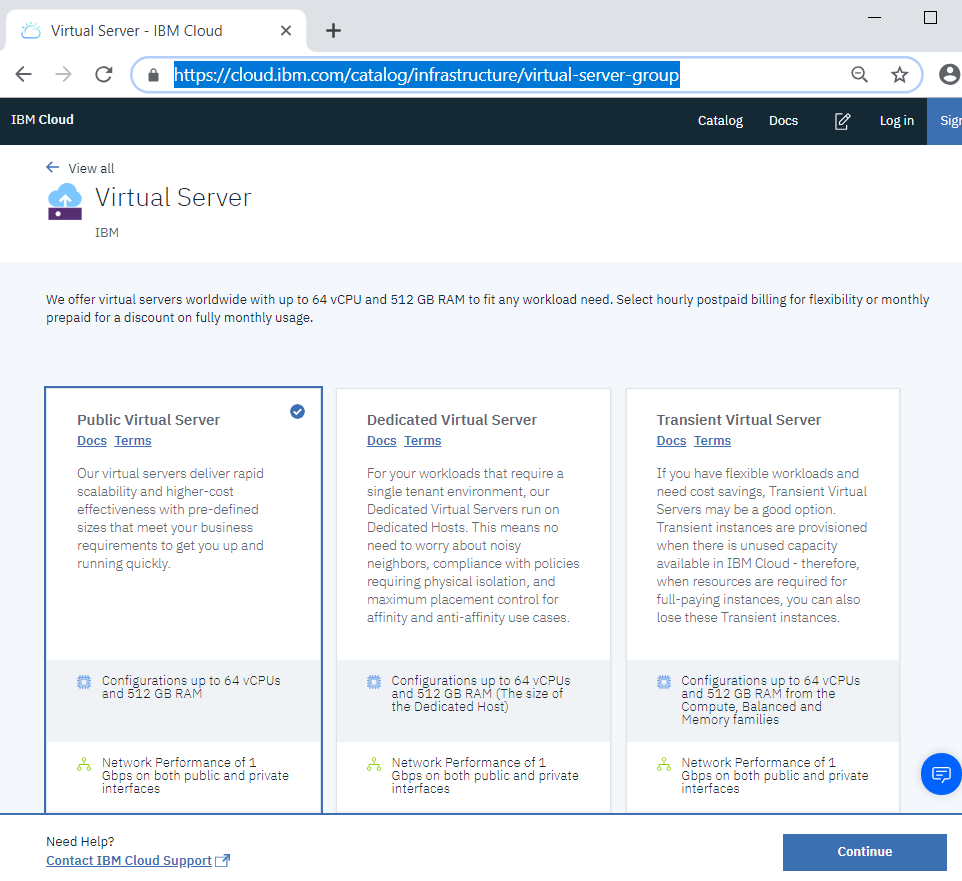
We login and need to find the "Virtual Server" product in the catalog (https://cloud.ibm.com/catalog/infrastructure/virtual-server-group) and select Continue. You can find the "Virtual Server" from the product Catalog, and search "Virtual Server". You will find it in the "Compute section".
We will select a Public Virtual Server (You can browse the other server
types, but for a simple test/work is just fine):
The settings are up to you. But for a proof of concept or basic setup.
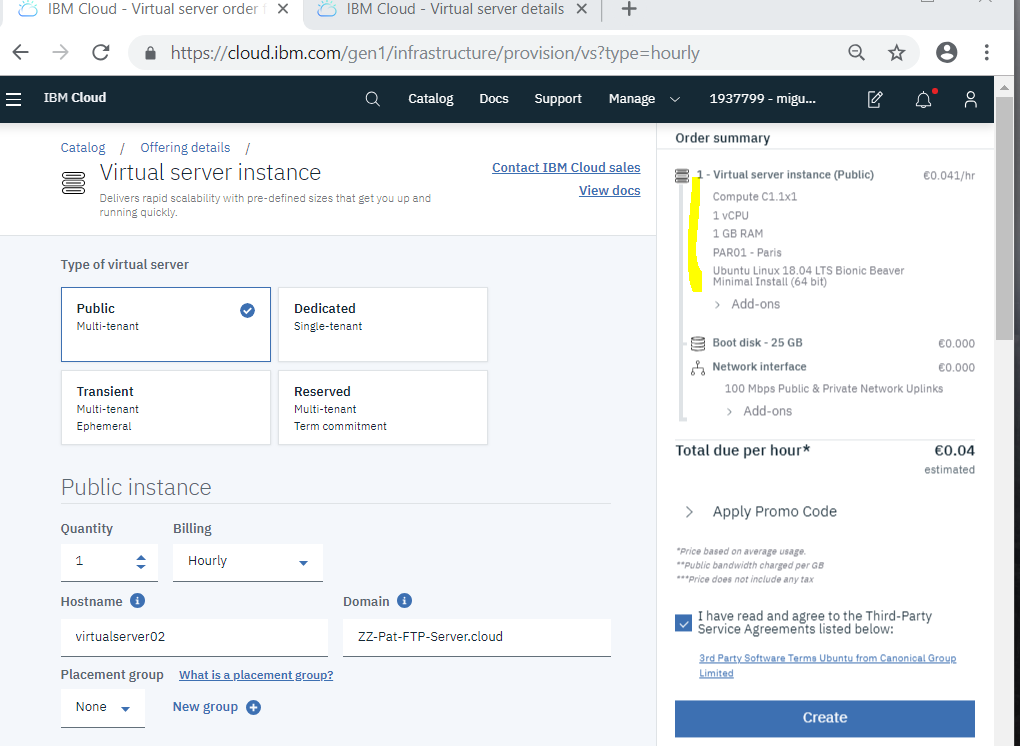
After accepting the terms "Create" The new device will come up in your device list:
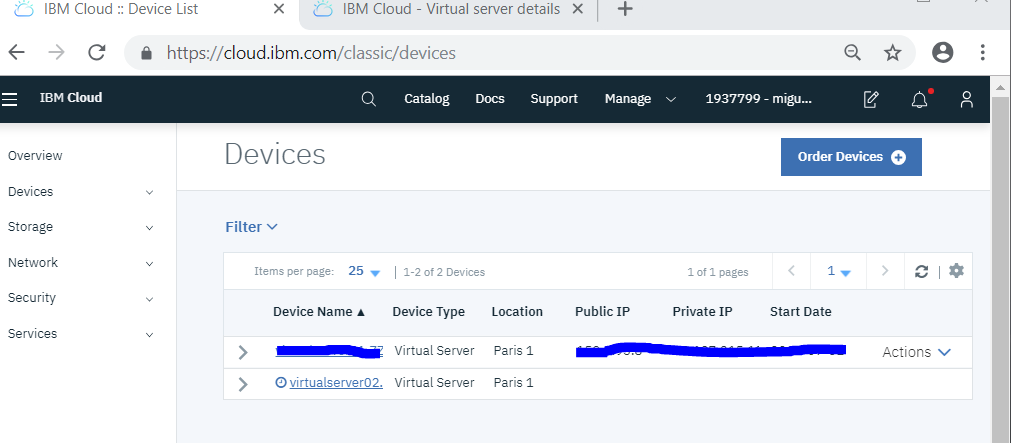
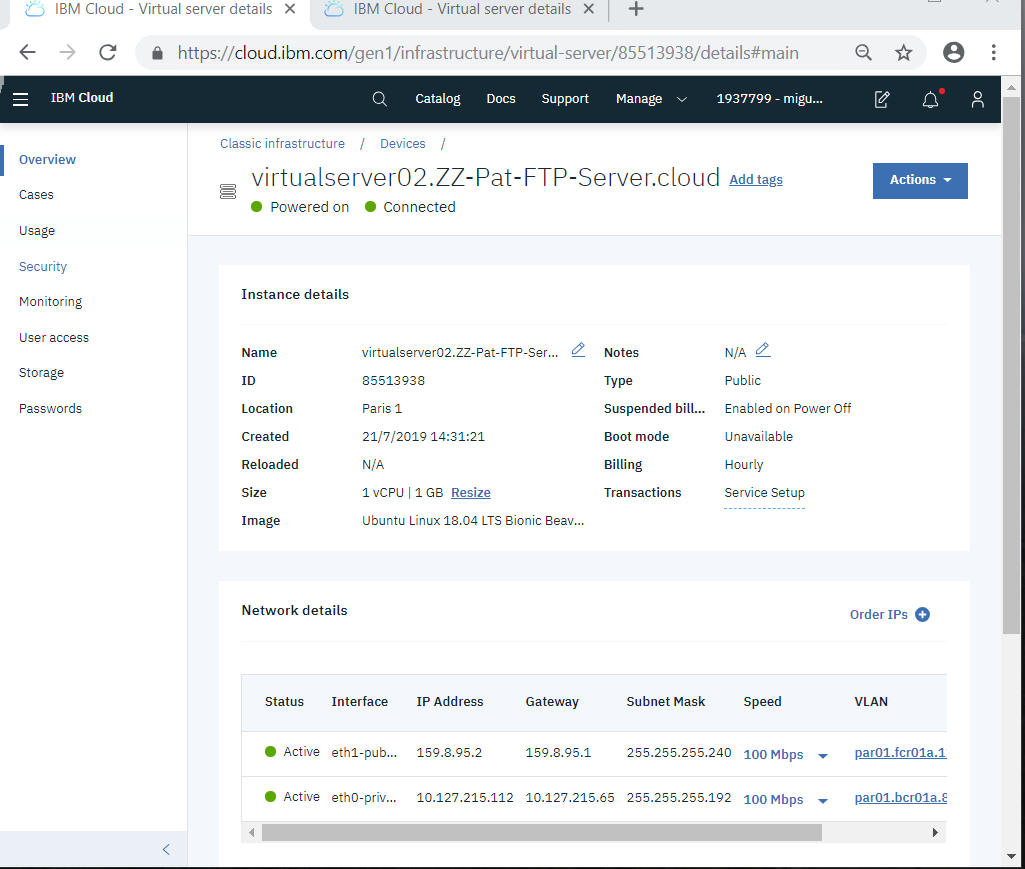
You select the new device (notice you will have a fixed IP address).
Note the IP address in the public interface (the first one):
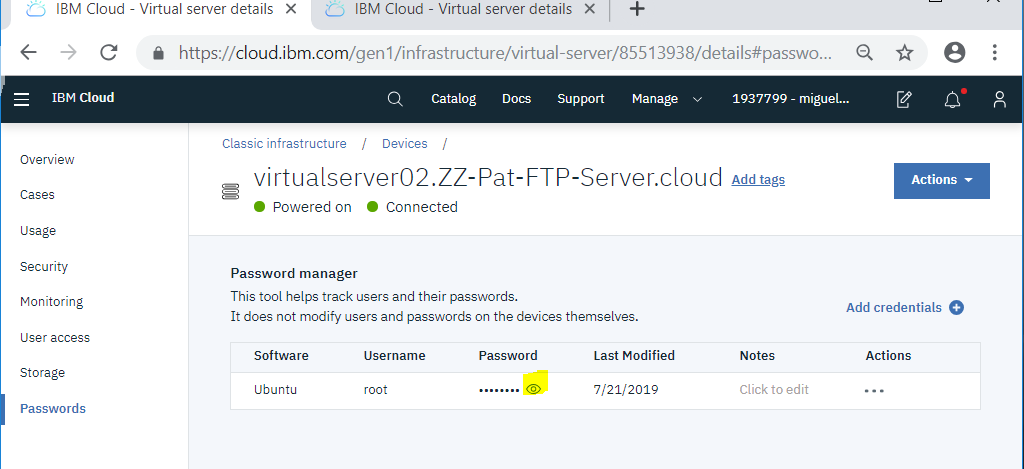
In this page we have to go to Passwords to go the "Password manager"
where you can display the root password for login (pressing the eye icon):
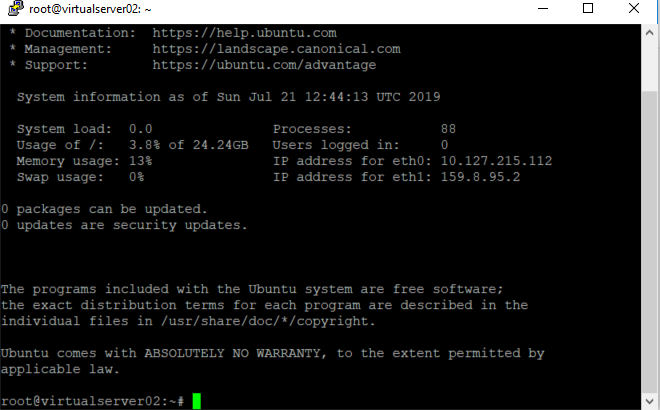
You are ready to login with PUTTY for instance:
Optional we will change the root password
sudo passwd root
We need update packages and install the very simple ftp daemon (vsftpd):
sudo apt-get update
sudo apt install vsftpd
The following steps will allows to set a firewall allowing only SSH (for terminal connection) and the FTP ports.
We need to open SSH (otherwise you will not be able to connect to the server)
sudo ufw allow ssh
(double check this command ends successfully, if
SSH is blocked you will not be able to login)
root@virtualserver02:~# sudo ufw allow ssh
Rules updated
Rules updated (v6)
root@virtualserver02:~#
We will open ftp ports:
sudo ufw allow 20/tcp
sudo ufw allow 21/tcp
sudo ufw allow 990/tcp
sudo ufw allow 40000:50000/tcp
And display firewall status with sudo ufw status
root@virtualserver02:~#  sudo ufw status
Status: inactive
To enable the firewall sudo ufw enable
To disable the firewall sudo ufw disable
root@virtualserver02:~# sudo ufw enable
Command may disrupt existing ssh connections. Proceed with operation (y|n)? y
Firewall is active and enabled on system startup
Command sudo fw status will show the ftp and the shh ports (22)
root@virtualserver02:~# sudo ufw status
Status: active

To                         Action      From
--                         ------      ----
22/tcp                     ALLOW       Anywhere
20/tcp                     ALLOW       Anywhere
21/tcp                     ALLOW       Anywhere
990/tcp                    ALLOW       Anywhere
40000:50000/tcp            ALLOW       Anywhere
22/tcp (v6)                ALLOW       Anywhere (v6)
20/tcp (v6)                ALLOW       Anywhere (v6)
21/tcp (v6)                ALLOW       Anywhere (v6)
990/tcp (v6)               ALLOW       Anywhere (v6)
40000:50000/tcp (v6)       ALLOW       Anywhere (v6)
Now your server is firewall protected in case you want it to do it.
We need to configure the ftp server.
We save the vsftp configuration (copy the vsftp.conf as vsftpd.conf.orig):
sudo cp /etc/vsftpd.conf /etc/vsftpd.conf.orig
We edit the file and verify:
# Allow anonymous FTP? (Disabled by default).
anonymous_enable=NO
#
# Uncomment this to allow local users to log in.
local_enable=YES
Allow write_enable:
#
# Uncomment this to enable any form of FTP write command.
write_enable=YES
#
Uncomment chroot_local_user (to avoid outside the chroot):
# the user does not have write access to the top level directory within the
# chroot)
chroot_local_user=YES
#chroot_list_enable=YES
We add a token to avoid change configuration file each time you add a new user:
# Uncomment this to indicate that vsftpd use a utf8 filesystem.
#utf8_filesystem=YES
user_sub_token=$USER
local_root=/home/$USER/ftp
Limit the range ports:
#
pasv_min_port=40000
pasv_max_port=50000
FTP access only if they are explicity added.
userlist_enable=YES
userlist_file=/etc/vsftpd.userlist
userlist_deny=NO
Save the changes
(userlist_deny=NO means only users in the list) Each user has to be added.
Restart the daemon
sudo systemctl restart vsftpd
This is the process to add a user:
For user named "sammy", we add the user, ftp dir, permissions
for ftp server and correct permissions with sudo adduser sammy
 root@virtualserver02:~# sudo adduser sammy
Adding user `sammy' ...
Adding new group `sammy' (1001) ...
Adding new user `sammy' (1001) with group `sammy' ...
Creating home directory `/home/sammy' ...
Copying files from `/etc/skel' ...
Enter new UNIX password:
Retype new UNIX password:
passwd: password updated successfully
Changing the user information for sammy
Enter the new value, or press ENTER for the default
        Full Name []: sammy
        Room Number []:
        Work Phone []:
        Home Phone []:
        Other []:
Is the information correct? [Y/n] y
We create a directory that will server as chroot and a
writable files directory for the actual files.
sudo mkdir /home/sammy/ftp
sudo chown nobody:nogroup /home/sammy/ftp
sudo chmod a-w /home/sammy/ftp
You can verify the permissions.
root@virtualserver02:~# sudo ls -la /home/sammy/ftp
total 8
dr-xr-xr-x 2 nobody nogroup 4096 Jul 21 13:22 .
drwxr-xr-x 3 sammy  sammy   4096 Jul 21 13:22 ..
Create a directory for the files uploads and assign the ownership to the user.
sudo mkdir /home/sammy/ftp/files
sudo chown sammy:sammy /home/sammy/ftp/files
We can verify permissions with ls
root@virtualserver02:~# sudo ls -la /home/sammy/ftp
total 12
dr-xr-xr-x 3 nobody nogroup 4096 Jul 21 13:42 .
drwxr-xr-x 3 sammy  sammy   4096 Jul 21 13:22 ..
drwxr-xr-x 2 sammy  sammy   4096 Jul 21 13:42 files
We need to sammy to the ftp user list:
echo "sammy" | sudo tee -a /etc/vsftpd.userlist
We can create a test file:
echo "vsftpd test file" | sudo tee /home/sammy/ftp/files/test.txt
We can try to access to the fpt server for instance from a windows terminal:
C:\Users\laika>ftp n.n.n.n
Conectado a n.n.n.n.
220 (vsFTPd 3.0.3)
200 Always in UTF8 mode.
Usuario (n.n.n.n:(none)): sammy
331 Please specify the password.
Contraseña:
230 Login successful.
ftp> ls
200 PORT command successful. Consider using PASV.
150 Here comes the directory listing.
files
226 Directory send OK.
ftp: 10 bytes recibidos en 0.00segundos 10000.00a KB/s.
ftp> cd files
250 Directory successfully changed.
ftp> ls
200 PORT command successful. Consider using PASV.
150 Here comes the directory listing.
test.txt
226 Directory send OK.
ftp: 13 bytes recibidos en 0.00segundos 13000.00a KB/s.
ftp> get test.txt
200 PORT command successful. Consider using PASV.
150 Opening BINARY mode data connection for test.txt (17 bytes).
226 Transfer complete.
ftp: 17 bytes recibidos en 0.00segundos 17000.00a KB/s.